iOS Automation Testing
iOS Automation Testing : Automation testing plays a vital role in ensuring the quality, reliability, and performance of iOS applications. In this tutorial, you’ll learn how to perform iOS automation testing using two major frameworks in Xcode: UI Automation and OCUnit.
What is iOS Automation Testing?
iOS Automation Testing : iOS Automation Testing allows testers to automatically verify app functionality through scripts instead of performing manual testing. This leads to faster test cycles, higher accuracy, and better regression coverage.
Automation in iOS apps is typically done using tools provided within Xcode, Apple’s official development environment.
Test-Driven Development (TDD) in iOS
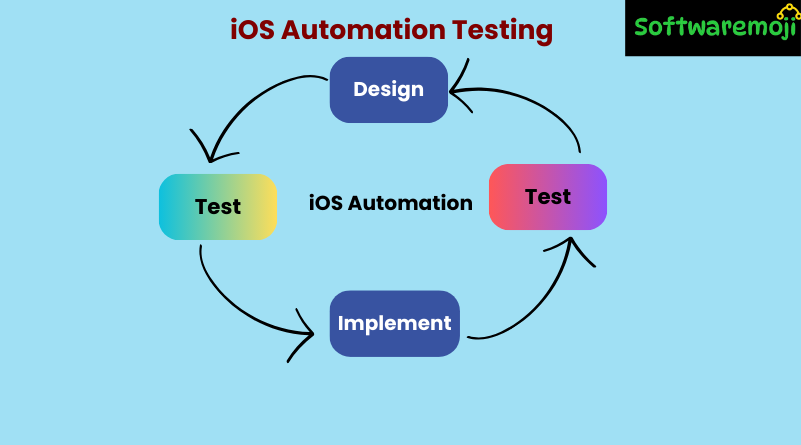
iOS Automation Testing : Test-Driven Development (TDD) is a software development approach that improves software quality by writing test cases before the actual implementation. It involves the following cycle:
- Design – Define what needs to be tested and design test cases.
- Test – Run all test cases; initially, they fail.
- Implement – Fix the code so that the tests can pass.
- Re-test – Run tests again. If they pass, implementation is complete; else return to the design phase.
TDD ensures thorough validation and minimizes bugs.
Setting Up Xcode Project for UI Testing
iOS Automation Testing : Before starting automation testing, ensure your Mac is ready with the following:
- macOS (latest version)
- Xcode IDE
- iOS SDK 4.0 or above
- Automation frameworks (UIAutomation, OCUnit)
A MacBook is required to set up and run iOS tests using Xcode.
How to Perform iOS Automation Testing Using UI Automation Framework
✅ Step-by-Step Guide:
🔹 Step 1: Launch Instruments
Go to:
Xcode → Open Developer Tool → Instruments
🔹 Step 2: Add Automation Instrument
In Instruments, select “Automation” from available instruments.
🔹 Step 3: Start and Stop Recording
Click the Red button to start recording user interactions. Stop recording when ready.
🔹 Step 4: Create New Script
In the Scripts section, click Add > Create to write a new automation script.
🔹 Step 5: Choose the App Target
Select the target application under test using the Choose Target drop-down in the Trace window.
(Example: Apple’s SimpleDrillDown sample app)
🔹 Step 6: Record UI Interactions
Interact with your app to record gestures, taps, and other UI actions.
🔹 Step 7: View Your Script
Switch to Script Log view from the drop-down to see your recorded JavaScript-based script.
🔹 Step 8: Run Your Script
Click the Play button to execute the recorded script and view logs/output.
How to Perform iOS Automation Testing Using OCUnit Framework
🔹 Step-by-Step Setup:
- Launch Xcode IDE and add a Unit Test Bundle Target.
- Name the new bundle and click Finish.
- Set the Unit Test as the active target.
- Create a group for test classes.
- Add a new Unit Test class.
- Begin your implementation in Objective-C.
💡 Note: OCUnit requires a working knowledge of Objective-C and integrates smoothly with Xcode for writing and running unit tests.
Sample UI Automation Script (JavaScript Format)
javascript
UIATarget.localTarget().frontMostApp().mainWindow().buttons()[“Login”].tap();
UIATarget.localTarget().delay(2);
UIATarget.localTarget().frontMostApp().mainWindow().textFields()[“Email”].setValue(“test@example.com”);
UIATarget.localTarget().frontMostApp().mainWindow().secureTextFields()[“Password”].setValue(“password123”);
UIATarget.localTarget().frontMostApp().mainWindow().buttons()[“Submit”].tap();
This example demonstrates a simple login interaction test using the UI Automation framework.
Benefits of iOS Automation with Xcode
- ✅ Faster execution of repetitive test scenarios
- ✅ Accurate and consistent results
- ✅ Reduced manual effort
- ✅ Early detection of bugs in the development cycle
- ✅ Seamless integration with CI/CD pipelines
Best Practices for iOS Automation Testing
- iOS Automation Testing : Always test on real devices along with simulators
- Use TDD approach for cleaner, testable code
- Maintain your test scripts in version control
- Utilize console logs and crash reports for debugging
- Use screen recordings or screenshots to report bugs
Common Challenges
- Requires macOS and Apple hardware
- UI Automation uses JavaScript, which may not be familiar to all testers
- iOS Simulator may not reflect real hardware behavior (e.g., camera, sensors)
Conclusion
Automation testing in iOS using Xcode’s UI Automation and OCUnit frameworks enhances testing speed, coverage, and reliability. By combining these tools with TDD practices, developers and testers can create high-quality, bug-free iOS apps. From recording user scenarios to running automated test suites, this tutorial gives you a complete guide to mastering iOS automation testing.
